Thursday, June 28, 2012

Project Feature: Holly & Brian's DIY Entry Storage Bench & Message Board

Greetings from good ol' West Michigan!  I'm visiting with my sister for a few days and got to see one of their latest DIY projects in person that I had to share! 

You might remember a while back when I shared some of their entryway storage ideas (post link here).  Well, take a look at their new DIY storage creation complete with storage bench and message board!
Awesome addition right?!?

In that original post, my brother-in-law created some illustrations showing different ideas for the entryway.  The storage bench + message board combination was one idea... 
Then another was a storage bench with wainscoting...
When we posted those options, a lot of you thought the wainscoting was the way and so did they.

 Brian drew up a few more illustrations for the wainscoting project, but a month later they decided to just built the storage bench for now because they had a bigger project to work on....
 Their 1st baby (and my 1st niece)!!!! 

So Brian whipped up this storage bench DIY style...
Perfect for putting shoes on and taking them off (and keeping them out of sight).
Brian also did a little DIY project on their message board.  They picked up this black painted white board + cork board combo with hooks. He popped out the white board (shown below on right)...
Then painted the white board with magnetic paint then chalkboard paint- I've never thought to do that nor did I know you could do that!  So their chalkboard is also magnetic for holding cards or photos.  Brian also made the small cork board darker using the same wood stain he used for the lid of the storage bench- I didn't know you could do that either!
The combination looks totally perfect together right?
Maybe the wainscoting will be added someday, but really who cares about that with baby on the way?!?  I know I don't :)

What do you think of Holly & Brian's new storage addition?
Did you know you could stain cork or make a chalkboard magnetic?

Now, I'm off to the zoo with my sister-in-law (Alex's sister) Amber and my nephew Henri!  Excited for some QT with little Henri!  Keep your fingers crossed we don't all get cranky in this awful HEAT!  Stay cool out there!

*** Click here to check out Holly & Brian's fireplace built-ins too! ***

Tuesday, June 26, 2012

Summer Plans and Projects

Something has been feeling kind of funny around here lately, maybe you've noticed it too?  Like something is missing right?  Well, sadly that thing we are missing is a project. 

We aren't in the middle of any kind of project right now, big or small, and it feels weird!!!  I know some of you are thinking 'well crazy lady it's good to take a break from projects,' and I totally agree!  However, Alex and I enjoy having things to work on when it comes to our house and even if we aren't physically working on something you can be certain we're talking about our next project plan.  So let's chat...

What's up next for our house?
I checked back on our 2012 project wish list to remind myself what we had hoped to accomplish within the year.  I'm happy we got the bigger projects like our Master Bedroom, the Guest Room, and adding wainscoting in the Dining Room but there's still a good amount of projects left... and considering it's almost July I'm pretty sure I get a big FAIL on my "Add landscaping (aka learn how to landscape/garden)" sad, well there's always 2013?  Anyway, based on our original list and a couple new ideas that came up since January, here is what we are planning on for the remainder of the year (I love a good list!)...

LONG overdue- staining and fixing our deck, which should have been done last summer but something else ruined any of our summer yard plans

The deck is totally priority #1 considering fall is right around the corner.  After that in no specific order...

I'm hoping to FINALLY finish updating our Kitchen Nook.  We left that project hanging blog-wise since January, but there has been a couple changes that I didn't write about.  Trust me, it hasn't been looking like this for six whole months.  That would drive me nuts!
 Speaking of leaving projects hanging, I guess I also did that with our Office redoBoo. I realize that it's pretty crummy of me to leave projects hanging but at least I'm learning to finish up projects before talking about new ones.  I guess that is my late 2012 blogger resolution?  Whoops, we are getting off topic, back to the Office redo.  Hmmm, not much else to say really it just needs to be decorated and done!
Another one on the list that sounds easy is adding crown molding to our stairwell but based on past experience, we're pretty certain it won't be easy (and I know it will be filled with Alex's favorite 4-letter words).

Lastly on the original wish list, I put "maybe's" by tiling the shower and installing new kitchen counter tops. That "maybe" is now a "probably not this year".  Those projects are a bit higher budget-wise and after thinking through all the planning and to-do's, we decided to wait until next year and $pace them out appropriately. Kind of a bummer, but we thought of a couple new project ideas that we wanted to take on that are on the simple side and kind of fun!

Remember "The Vestibule"? I have been lovingly referring to as "The Vegetable" since then (LOL), but we got so many fun comments and ideas for that little space that we have to do something with it right?!?  Shouldn't be too complex so it's on!
And since we're talking about updating our Vegetable Front Entryway, why not spruce up the Back Entry... especially when you consider that we haven't done anything to it in two years... and it looks rather dumpy.  Yep, dumpy.  We've upped our DIY game since then, I think we can do better.
 
There, that's the updated list. 
Now we certainly have plenty to keep us busy through the summer and into the fall!

Speaking of summer and plans, I can tell you now that July is going to be a crazy month!  I will be doing some personal and work travels which means you might be seeing some more of Alex (aka Mr. Hammers and High Heels) in the next few weeks.  I think we all know from past experience that my hubby loves to keep busy with projects (complete with Disney references and photo montages) while I am away... what a guy!

Let the crazy busy July begin! 
I am heading to Michigan tomorrow for a very special visit!  I will share more about that later this week along with some follow up to my Head Over Heel Friday question (thanks for all of your comments so far!).  See you soon!

Friday, June 22, 2012

Head Over Heels Friday.........?

Instead of a regular "Head Over Heels" post today, I was hoping to get a little help or advice from you folks out there regarding the series.  Sound okay with you?  I hope so!  Here's what I'm wondering about...

It was a little over a year ago when I decided to start this weekly series (see that post here).   The basic idea was that I'd be able to write about things I felt inspired or excited about during the week outside of our house and DIY projects.  Since then, I've written 64 Head Over Heels posts about anything from shoes, projects, other bloggers, shopping trips, dates, holidays, fashion, our dogs, wedding decor, games, pop culture, etc. When I look back, there are a lot of posts I really love and some that are pretty crappy... I can't lie

The thing is, I love that the series gives me a reason to blog about something random if I want but I never want it to sound random or strange.  With that said, I'd love to ask what you think the series should be or what would make it better.  Here's a few questions to start...

Are there certain topics I should stick to for the series?
Which posts from the series do you like or remember because they were interesting?
Would these posts be more fun if they were linky parties where others can share what they love that week too?

*Kindly* share your thoughts!  I certainly will appreciate any and all feedback :)
Have a great weekend!!!

Wednesday, June 20, 2012

Are You a "Gladys Kravitz"? I Think I Am.

Just call me Carla Kravitz
That's what Alex calls me when I peek out our blinds to see what's going on in the neighborhood.  Does anyone else out there have "Gladys Kravitz" tendancies too?

Now I hope most of you out there are familiar with the Gladys Kravitz character from the show "Bewitched" but here's some background just in case...  Gladys Kravitz was the extremely nosey neighbor to Darrin and Samantha Stephens.  Gladys would often peek through her curtains catching Samantha using her witchcraft to which she would yell "ABNER!" (referring to her husband), and could never quite prove her assertions to him... aka her hubby thought she was super caaaaa-razy!!!!
My "Carla Kravitz" moments are a bit different since I don't suspect any neighbors of witchcraft... although yelling "ALEXANDER" sounds kind of like yelling "ABNER" (haha, that might be the only part that is similar).  But I can't seem to help being curious about the house happenings around here!

Why? 
I think it is pretty clear to anyone that reads our blog that I love home decor and homes, especially old homes!  So my "Kravitz-ing" isn't really about being nosey with neighbors, but being nosey with the houses!  Most of my recent window snooping has been because so many homes are getting nice updates like new fences, paint jobs, stucco work, concrete, roofing, and landscaping.  I know some might be leftover work from last year's tornado damage, but it's so wonderful to see all these fresh updates! Kind of gives us ideas and inspiration for our own future updates (when timing and budget allows of course).

Aside from home ideas & inspiration, I also think keeping an eye on my surroundings is always a good thing.  I guess I am a protective person when it comes to my family, home, and neighborhood. Thankfully, I'm pretty sure my neighbors feel the same :).  At least if anyone spots me Kravitz-ing I wouldn't have this awful hair-do...
You knew there would be a silly Photoshop job in this post right?!?!

Anyway, who's with me???
Are you guilty of Gladys Kravitz moments too?
Are you always in the know about home projects in your neighborhood?
Have you ever been caught "Kravitz-ing"
Does anyone actually have a husband named ABNER?!?!

I'm dying to get the answers to these questions and many more!!!  Well, maybe not more but you get the idea.  Let me know what you think! I'm going to go see what's going on outside now, LOL!

Monday, June 18, 2012

My Not-So-Fun Chair Redo Is Complete!

 Thank. The. Lord.
My DIY chair redo is COMPLETE!!! Here's how it's looking now and what it looked like then....
 It seems like forever long ago when I picked up the chair at an estate sale for just $2.00.  I was excited to take on a full-on reupholstery project at the time, who knew it would be so difficult and take so much time to complete, yuck! But thank goodness it is DONE, DONE, DONE... and I still have all my fingers, LOL!
I tried to document the steps I took to refinish the chair but since I was learning along the way it ending up being a lot of trial and error- which isn't easy to capture in photos, let alone write it out step by step.  So, this really isn't a full tutorial, but I can walk through the  torturous memories general steps that took the chair from before to after.  Here we go!

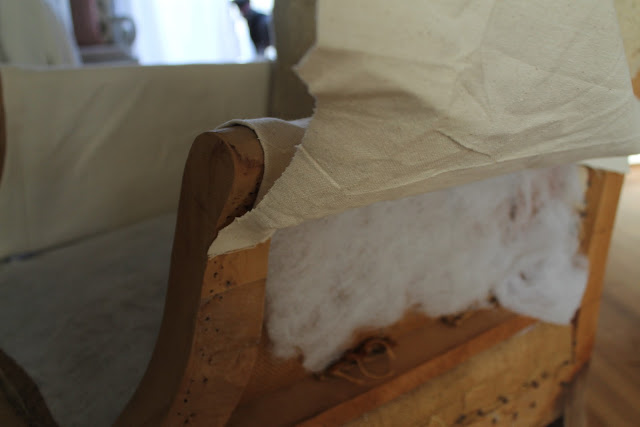
That part is always really yucky, but I then had a look at my blank slate!
I ended up using Klean-Strip Premium Stripper to remove the paint from the legs.  I liked the look of the lighter raw wood and I wanted to leave some that was hidden underneath the old upholstery exposed.
After scraping off the old paint, I sanded the legs some more so they had a smooth even finish.
Next it was time to start the reupholstery part (aka the really crap-tacular time consuming part). 
Before covering the chair with any fabric I added a fresh layer of polyester batting in places where the chair needed some extra fill.  Once it came time to start the fabric I decided to tackle it in 4 parts....

- Chair Back
- Seat
- Left Arm
- Right Arm

I started with the chair arms.  I figured it would be easiest to start there since essentially all I had to do was wrap the fabric over each arm and secure it with nail head and staples.
When I discovered the carved wood arms hiding under the old upholstery, I knew I wanted to keep them uncovered.  It's a feature too nice to hide!  To keep them out, I laid the fabric over each arm and cut it following the curved shape of each arm.  Then I folded the cut edge inward so all you can see is the clean folded edge. 
Once the fabric was in place over each arm I secured the inside fabric (by the seat cushion) using a staple gun and stapling the fabric to the wood frame underneath.  It required a lot of muscle squishing the seat down and pushing the staple gun in enough to reach the wood frame... totally annoying and not fun.  For the outside edge I used A LOT of nail head trim to secure the fabric, but used the same idea of folding the fabric inward (shown below).
For the seat, I took a rectangular piece of fabric cut to fit over the seat cushion and pieced it together with a separate section of fabric to attach on the front edge.  I thought the double stitch detail would be a nice feature so the fabric didn't look as though it were just wrapped over the seat edge. Then, I stapled the fabric to the inside wood frame and used nail head trim along the folded bottom edge (shown above).

For the chair back part, I wanted to make it one piece that slipped over the top and fit the chair perfectly.  So I guess this step was kind of like making a slipcover/ chair cover.  I laid the fabric over the top, cut it where needed, and pinned it in place.  Then, I hopped on my sewing machine and stitched away.  The top two corners were really tricky, I had to sort of pleat them so they gathered.
Once I got the chair back cover to fit, I secured it in place similarly to the arms & seat by stapling it where it wasn't visible and using nail head where it was visible. 
Here's a look from the back that illustrates how each piece came together...
 I know it isn't 100% perfect but I am pretty happy with how it turned out and really I did learn a lot from the experience.  Knowing what I know now, I probably would have done a few things differently... maybe next time, if there ever is a next time???  I am not eager to start a reupholstery project anytime soon :)

Now all we have to do is figure out where to put it in our house, hmmmm....

Well, how do you think the chair turned out?

Friday, June 15, 2012

Head Over Heels Friday: Accessorizing with DIY Tassels! Tutorial Included!

Thanks to a fun little craft lunch I had with coworkers this week, I'm Head Over Heels for Tassels! 

They are chic little accessory piece for you OR your home decor, plus you can make your own in a few easy steps for under $1!!!  Check out my DIY tassel creations....

 There possibilities for adding them to your shoes or accessories are endless, I loved all of these ideas!


Adding them to your home decor is a little trickier, but I thought these were pretty chic examples!
Tassel Trim Window Panel   Black Tassel Furniture Accessories

Now I have to give my standard "Hammers and High Fives" to my work gal pals Lauren and Katie Lee for teaching me this new DIY skill!  I know there are plenty of these tutorials out there, but I think mine might be a simplified version (no cardboard needed).  Let's get started!

You can make tassels out of different materials (yarn, fabric, leather, etc.). For the tutorial, I used six strand cotton floss with a metal ring.  You can use as little or as much floss as you'd like, the more you use the thicker/bigger the tassel will be.

First, remove the paper wrap from the floss but KEEP IT IN THE LOOP AS PACKAGED!  That is the cardboard time saving step.  Next, carefully cut a 10-20 inch piece of floss to be used in later steps (shown in left photo).  Then, carefully line up the floss, lay it flat, and using a small piece of floss (or thread, this ends up getting cut off near the end) tie a knot around the middle of the looped floss.
Once the middle it tied together, grab scissors and cut the looped ends open on each side (show in left photos below).  Then take the metal ring and place over the middle section where the knot was tied.  Remove the floss/thread knot and fold in half. 
Take the 10-20 inch piece of floss you cut at the beginning and wrap around the folded floss just below the metal ring (shown below).  Lastly, trim the ends of the floss as needed to make sure your tassel has a clean finished look!
There you have it, easy as pie right?!?!  You can make them any size and length depending on how you want to use it.

  Here's another look at my lamp accessory piece, I made the tassel thinner and longer.
For the necklace I made, I actuall found the perfect chain in my grandma's jewelry box (which my aunt passed along to me).  I store my jewelry in the bottom two drawers but kept my grandmother's jewelry in the top.
I remembered that she had a couple gold chain necklaces and sure enough one of them looked perfect with the tassels I had made....
Super cute right?!?  I love it even more because of that sentimental touch!

Are you Head Over Heels for Tassels and this tutorial too?!?

What else are you falling for this week?

Glad it is the weekend!  I'm totally going to finish my chair project (finally)! 
Have a wonderful weekend everybody, hope you cross off something from your to-do list too!

Tuesday, June 12, 2012

Stripping, Sanding, Stuffing, Sewing and Stapling, Oh My!

Well, that little reupholstery project that I hoped to have done this past weekend isn't... booo.  It actually has turned into a real pain mentally and physically.

Unlike my last (super simple) chair redo, this one is turning out to be more complicated and time consuming that I anticipated :(  I guess I knew going into it that it would be hard given the fact that is is my first attempt at a full-on reupholstery job, but holy moly there was so much more to this project than I thought there would be.

 Sanding....
 Stuffing...
 Sewing....
... and stapling.
Which I guess brings me to the physically painful part. 
In order to add the fabric to the chair, I have had to use a staple gun to staple it on (in places where they won't be visible) or use nail head trim (where it is visible and where the fabric meets the wood surface).  Sadly, not every placement of a staple or the nail head was accurate on the first try so I had to pull them out which isn't easy on the fingers even with pliers.  I'm also thankful I haven't shot a staple through one of my fingers yet!
Additionally, I have about 150 single pieces of nail head trim to add to this chair individually with a hammer... and my fingers.  "Ouch" is an understatement, I have regrettably used many other four letter words.

Alex keeps telling me I sound like that poor old lady in the movie Happy Gilmore with the memorable "My fingers hurt" quoteBut really, they do! 

In some ways I guess I am feeling a little defeated and annoyed that it is taking so long to finish.  I can only hope that I will be happy with it once it is done.  Geeze, no wonder those Restoration Hardware chairs cost so much, LOL!

Alright, here ends my rant because I'm about to continue adding nail head trim. At least I can count on the OC Real Housewives for some mindless entertainment as I work. 

Who's with me?  Can I get a Vicki style "Woo-Hoo"?!?!

Friday, June 8, 2012

Head Over Heels Friday: A Perfectly Matched DIY Chair Pair!

You might remember a few Fridays ago when I wrote about finding my chair's long lost twin.  Well, it took me a while to finish chair #2's redo but it is finally done!  Now, I have a beautiful matching set totally worthy of my Head Over Heels honor this week! Not bad for spending just $20 on both, score!
Here's a 'before' look of chair #2 on the left.  I picked up the first chair on the right over a year ago and refurbished it.  I had no idea there was an identical chair and I am so happy I found it!
 In the last post, I showed the chair looking like this after tearing away the icky upholstery.
 After that, the rest of the redo was pretty much the same as the first (click here for tutorial steps), but I did do one thing differently.  For the first chair, I only used a layer of foam on the seat and then covered with fabric.  It turned out fine, but I had wished that the foam under the fabric looked a bit smoother.  So, this time I added in a layer of polyester batting and it did the trick to smooth it out! Here's a few pictures of that step...
 It was pretty simple and then all I had to do was cover the seat with fabric using a staple gun.  As you can see I didn't end up using a different fabric/ pattern on the chairs. It seemed like most of those who commented on that thought I should keep the same look and I am glad I did! 

 It turned out just as nice as the first chair and I still love that neutral look. Makes it easier to update their look just by adding colorful pillows!

 Here's another look side by side.  They look perfect in our house and compliment the white wood trim nicely.
 But the sad thing is that with the way our Living Room is laid out, they don't really fit side by side without looking awkward in the space. 

So for now we have one in the Living Room (as shown in the recent photos from our last post) and the other is in the Sunroom which is through the arch at the end of our Living Room....
Eventually we might rearrange things again and figure out how to fit them together. But for now, I'm thinking they look just fine where they are.

Are you Head Over Heels for this chair redo times two?!?!  Who doesn't like a nice looking pair... of chairs??? LOL!

I have to get moving on that other (and more challenging) chair redo this weekend.  Hope I can get that bad boy done too!  Have a great weekend everybody and stay cool!